
A stone chip is the small, sharp-edged dink you get when a stone flicks up off the road and knocks a tiny piece of paint clean off the panel. They’re the most common damage a car picks up on UK roads, and on the face of it they look harmless. The trouble is what happens next. A chip that’s reached bare metal is an open door for moisture, and that’s exactly where rust begins. The good news is that stone chip repair is genuinely easy to do yourself, and this guide takes you through how to repair a paint chip on a car in four steps, then through the related problems chips tend to bring with them.
What You’ll Need
Stone chip repair needs very little, and a good colour-matched kit covers nearly all of it. A typical kit gives you the paint matched to your car, a blending solution for levelling the repair flush, and a polish, along with an applicator for working into a small chip.
We’d suggest finding a kit that also includes things like: precise applicator brushes, paint removal cloth, microfibre cloth and often forgotten but very useful, nitrile gloves.
If you want to find everything you need in one place, you should check out our kits, just pick your car brand from the list and you’re sorted.
The one thing to sort before you start is your car’s exact paint code, because the colour match is what decides whether the repair vanishes or shows. The code lives on a sticker in the driver’s door jamb, under the bonnet or near the spare wheel.
You can also drop your registration into our colour-match tool and have the exact factory colour back in seconds.
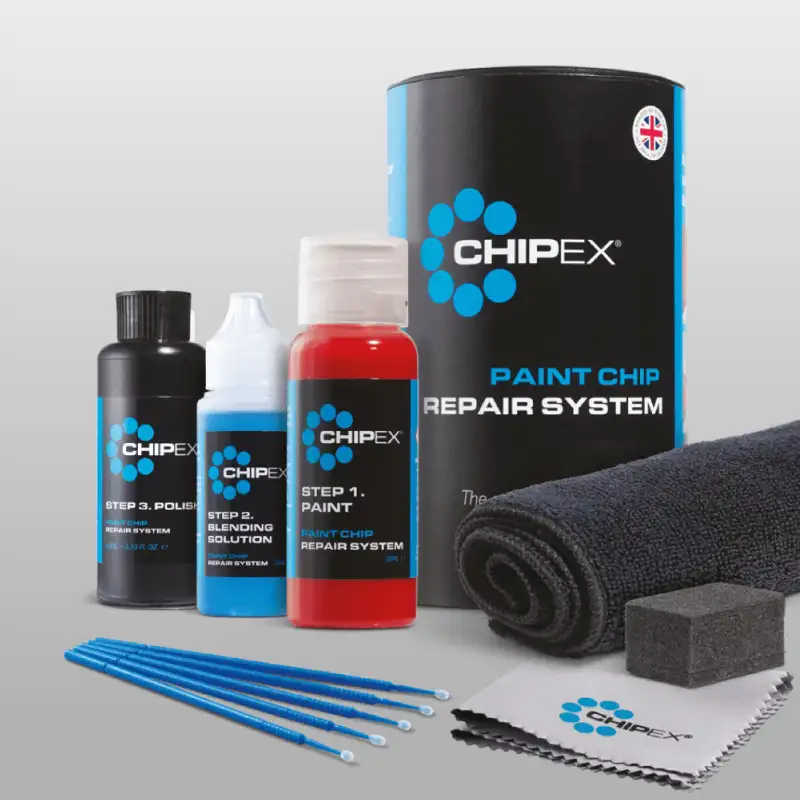
Quick checklist, everything to gather before you start:
-
- Colour-matched touch-up paint (your exact paint code)
-
- Blending solution for levelling the repair flush
-
- Finishing polish
-
- Applicator brushes for placing the paint
-
- A paint removal cloth
-
- A microfibre cloth
-
- Nitrile gloves
How to Repair a Stone Chip in 4 Easy Steps
Before you start, one thing is worth clearing up. If a friend has talked you through fixing a scratch, or you’ve watched a tutorial for one, it’s worth knowing that a chip is a different job, and the scratch method won’t serve you well here. A scratch is a long line, so you work along its length and feather out the two ends so they don’t show. A chip is a tiny pit, so there’s no line to follow and nothing to feather. Instead, the job is to fill the pit, build the paint up in layers until it sits level, then bring it flush and polish. The materials overlap, but the technique doesn’t, so it’s worth following a chip-specific method rather than borrowing one meant for scratches. Think filling a pothole rather than painting a line.
Step 1. Find Your Exact Paint Colour Match
Before any paint goes on the car, this is the step that decides whether the repair vanishes or sticks out. The colour match is the single biggest factor in a successful chip repair, and getting it even slightly off is the most common reason home repairs disappoint. A colour that’s a fraction lighter, darker or with a different undertone will catch the eye against the surrounding paint every time, especially in direct sunlight.
Every car has an exact factory paint code, and that’s what you need to order from. The code lives on a small sticker, usually in the driver’s door jamb, on a plate under the bonnet, or sometimes near the spare wheel. It’s a short string of letters, numbers or both, sitting next to the words “paint” or “colour”. Don’t rely on the colour name on the V5C logbook, because that only gives a broad description like “blue” or “silver” rather than the precise factory shade.
If you’d rather skip the hunt for the code, our colour-match tool pulls up your exact factory paint in seconds from your registration.
Pro tip: Don’t settle for “close enough”. A code that’s one digit off, or a colour name shared across model years, can mean a noticeably different shade on the panel. The code matches your car, not just a general look.
What can go wrong: Ordering by colour name alone is the classic slip. Manufacturers reuse names like “Performance Blue” or “Frozen White” across years with different codes, and the wrong code means a visible mismatch you can’t blend out later. The code is what counts.
Step 2. Apply the Touch-Up Paint
Start by getting the chip ready. Wash it and the area around it with warm soapy water, dry fully, then wipe over to lift any wax, polish or road film. Removing all wax and polish from the chipped area itself matters most, because paint won’t grip otherwise. If any loose paint is lifting around the rim of the chip, ease it away gently so you’re working into a clean, stable crater.
Now shake the paint bottle thoroughly. This is more important than it sounds, because the pigments settle, and an unshaken bottle gives you a poor finish on the panel.
Apply the paint with the supplied applicator brush, placing a small amount directly into the centre of the chip. For larger areas with several chips clustered together, often called road rash, you can dip a gloved finger into the paint and apply it that way instead. Once the paint is in the chip, smear it flat across the area with the tip of your finger or thumb, still wearing the glove, so it sits level rather than as a domed blob. Leave it to go touch dry. Drying time is anywhere from 30 seconds to 5 minutes depending on the temperature and how much paint you’ve used.
For deeper chips, build the paint up by repeating this step. Add another light layer once the first is touch dry, and keep going until the chip is filled level with the surrounding surface. Patience here is the whole trick. Several thin layers always finish better than one thick one.
Pro tip: The Chipex applicator brush is designed to hold and release exactly the right amount of paint for chip work. It gives you proper control over where the colour lands, which is why we don’t recommend cocktail sticks or other improvised tools. They tend to drop too much paint at once and end up smearing across good clear coat.
What can go wrong: The most common error is applying too much paint in one go. A big blob skins over on top while staying soft underneath, and dries into a raised lump that’s harder to disguise than the chip was. If you do put on too much, don’t try to wipe it off wet, just let it dry fully and bring it back level in Step 3.
Step 3. Apply the Blending Solution
Once the paint is touch dry, the next job is bringing the repair perfectly flush with the panel. This is what the blending solution is built for. It softens and removes the slightly raised paint and feathers the edge so there’s no visible ring around the repair.
Apply a small quantity of the blending solution to the paint removal cloth and run it gently across the repair using light pressure. Don’t rub hard. The blending solution does the work, not the force you put behind it. Keep your passes light and check the surface with your fingertip as you go. The moment it feels smooth and level with the surrounding paint, stop. Leave it to dry for a few minutes before moving on to the polish.
The blending solution also doubles as your safety net. If you’ve made any mistake during paint application, whether that’s too much paint, paint outside the chip, or simply a result you’re not happy with, a bit more blending solution on the cloth will take it back off so you can start over. It’s the most forgiving part of the whole process and means there’s no real way to ruin the repair.
Pro tip: Always work in light, patient passes. It’s easy to take a touch more paint off the top, but if you push too hard you can pull paint back out of the chip itself, and you’re back to filling it from scratch.
What can go wrong: Going in heavy, or starting before the paint has firmed up, drags the new colour straight out of the repair. Give the paint a minute or two to settle, then keep the cloth moving gently.
Step 4. Polish to Blend
Once the panel surface is dry from the blending solution, finish the job with the finishing polish. Apply a small quantity to the microfibre cloth and gently rub over the entire treated area in small circles with light pressure for a few seconds. Once the polish has dried to an opaque haze, gently buff it off with a clean, dry section of the microfibre cloth until the surface comes up clear and the repaired spot catches the light the same way as the paint around it.
For the best result, polish the whole panel rather than just the repaired area. Fresh paint can sit slightly differently against the surrounding clear coat, and bringing the whole panel up to the same gloss is what makes the repair genuinely disappear into the bodywork.
Pro tip: Give the paint a day or two to harden before this final polish rather than going straight in the same afternoon. Polishing paint that’s still soft just lifts the colour you’ve spent the time building up.
What can go wrong: Too much polish, or a dirty cloth face, leaves a dull haze you’ll have to redo. A small amount on a clean cloth brings the shine back far better than a thick smear.
A Note on Curing Time
Two timescales are worth keeping straight. Touch-dry is the minute or two between dabs while the surface firms up. Fully cured is the month or so it takes the paint to harden all the way through. You can drive and gently hand wash the car almost straight away, but hold off on waxing, sealing or machine polishing for around four weeks. Touch-dry and fully cured are not the same thing, and rushing that is the classic mistake.
Why a Stone Chip Is Worth Fixing Quickly
It’s worth understanding what you’re actually dealing with, because it explains why a tiny chip is worth ten minutes of your time.
Your paint is built in layers. A clear coat on top for gloss and protection, the colour coat beneath it, a primer layer below that, and the metal panel underneath everything. A stone chip that’s only knocked off the clear coat is cosmetic and in no hurry. A chip that’s gone deeper, down to the grey or black of the primer or the bright silver of bare metal, is a different matter. That little pit holds water against the metal every time it rains, and in a damp British climate rust can take hold within days.
Chips also tend to arrive in the same handful of places, because that’s where the road throws debris. The leading edge of the bonnet, the front bumper, the wing mirrors, the lower doors and sills, and the A-pillars beside the windscreen all take the brunt of it. If you find one chip in these zones, it’s worth checking for others nearby, because they rarely travel alone.

The Other Problems Stone Chips Bring
A clean, fresh chip is the simple case. In practice, chips often come tangled up with a few related problems, and knowing how to read them is what makes the repair stick.
Rust has already started. If you see an orange or brown stain in the bottom of the chip, rust has begun, and paint laid straight over it will lift within weeks. The rust has to be removed or chemically treated first.
Light surface rust is still a home job, and our guide on treating surface rust covers it step by step.
A whole cluster of chips. The bonnet leading edge and front bumper often pick up not one chip but a scattering of them, sometimes dozens of tiny ones. The method is exactly the same, just repeated, and one kit will comfortably handle a panel full of chips. It’s worth doing them in one session so the whole area cures together.
The paint is lifting around the chip. If the paint around the chip is bubbling, flaking or lifting away rather than sitting as a clean crater, the damage has moved beyond a simple chip. That usually means rust has crept under the surrounding paint, and the affected area needs cutting back to sound metal before it can be sealed. This is the point where a larger repair, or a bodyshop, starts to make sense.
Chips on plastic versus metal. Most front bumpers are plastic, which is reassuring, because plastic doesn’t rust. A chip on a plastic bumper is purely cosmetic and in no rush. A chip on a metal panel like the bonnet or a wing is the one to prioritise, because that’s where corrosion can set in.
It’s really a deep gouge, not a chip. If the damage is long and linear rather than a small pit, it’s a scratch, and the technique changes to working along the groove. Our step-by-step guide to fixing a deep scratch covers that properly.
Stopping the Next One
Since chips cluster in the same exposed areas, a little protection goes a long way. Paint protection film over the bonnet leading edge, front bumper and mirrors takes the hits that would otherwise reach the paint, and leaving a bit more distance behind lorries and on gravelly roads cuts down how many you collect in the first place. No car avoids chips entirely, but you can slow how fast they arrive. Our guide on protecting your paint from stone chips goes through the options.
Search by using your Registration
Frequently Asked Questions
How long does it take to repair a stone chip?


Can I repair a stone chip myself?
Do I need to treat rust before painting?
What’s the difference between repairing a chip and a scratch?
Will the repair be invisible?

Johnny Graham – Founder of Chipex
Johnny founded Chipex in 2009 and developed its patented paint repair system, now trusted by over 1.5 million customers worldwide. With nearly four decades at the premium end of the automotive industry, he remains closely involved in refining Chipex’s paint formulations and colour-matching technology.


